
Developing an Animal Crossing companion app with Ionic

by Matt Fantinel
28 Jul 2020 - 13 min read
This year I've played a lot of Animal Crossing New Horizons. It came out at the start of quarantine - and was extremely popular for providing an escape from that, with a virtual life that's free of the problems we're facing on the real one.
In the meantime, I was re-discovering Ionic and wanted to work on an app that would help me improve my knowledge of it, and as a bonus learn about other stuff I've been interested in. So, I decided to work on a companion app for the game I've been playing so much.
This post illustrates my experience developing it. It is not a tutorial or an in-depth guide. It's just meant to describe my experience, what I learned and any bumps in the way. In any case, the source code is available on GitHub for all to see and modify. If it ends up helping anyone else in the way, even better!
You can check out the finalized app here.
Creating the app
Since I'm testing Ionic (version 5 as of writing), I tried to check out as much of the experience they provide as I could. Even though you can create an app via their CLI, they also provide an online App Wizard to do that visually. It's a pretty cool way to display the starting templates, easily setting theme colors, default icon and the JS Framework you'll use. I chose Angular for this one.
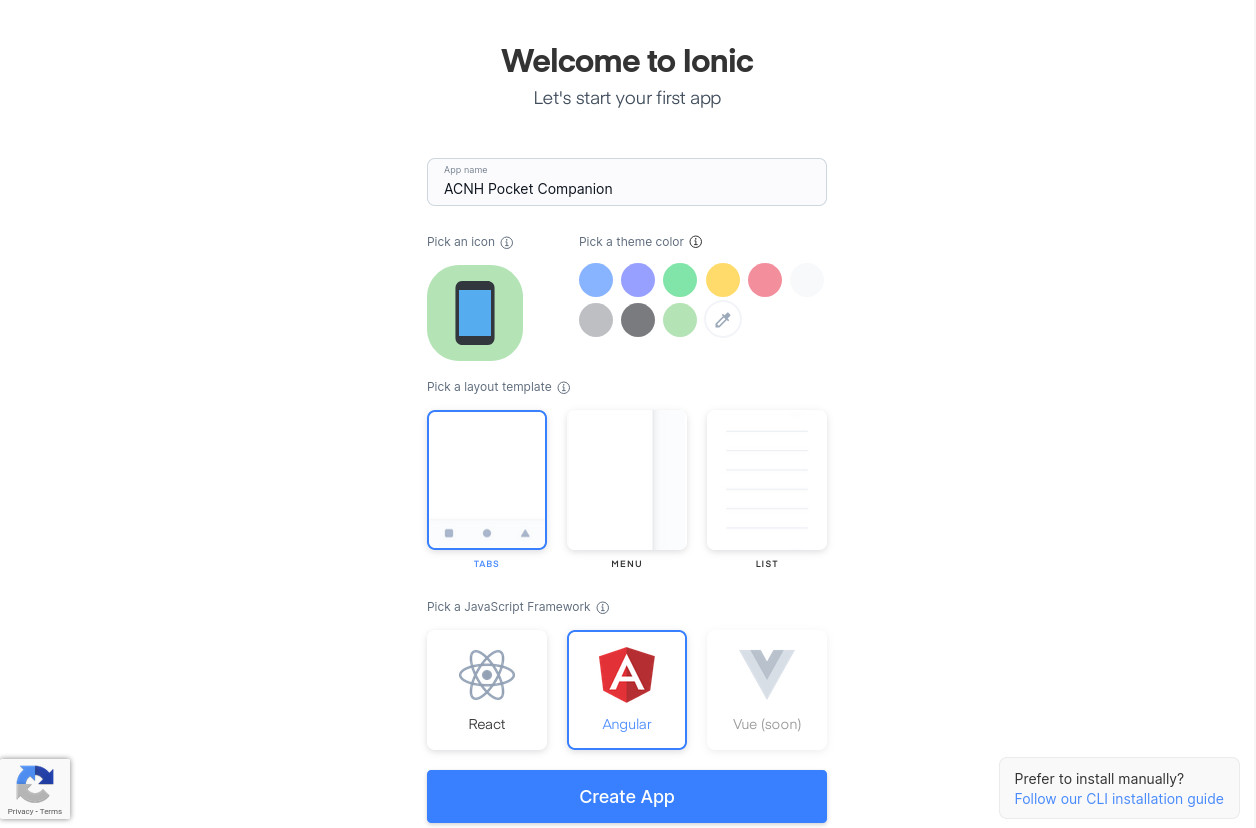
After setting it up, the wizard gives you a CLI command with an ID to run on your machine. Therefore it still uses the CLI in the end, but it's a nice touch for the starting experience.
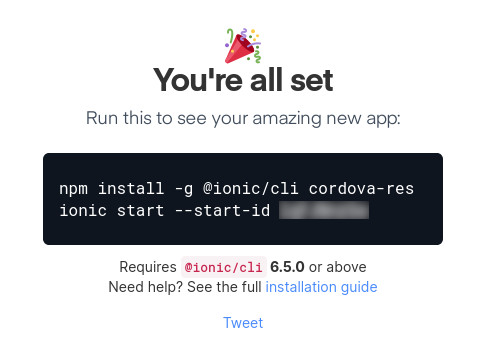
After running that command, the CLI prompted me if I wanted to integrate with Capacitor, which is a tool that makes the app deployable to Android/iOS. I accepted, since I plan to release it on the Play Store at some point. The main goal is to release the app as a PWA, but an Android version wouldn't hurt, since the publishing process is almost-free and there's almost zero extra effort involved. Publishing it for iPhones is not a goal due to the cost and effort required to publish on the App Store.
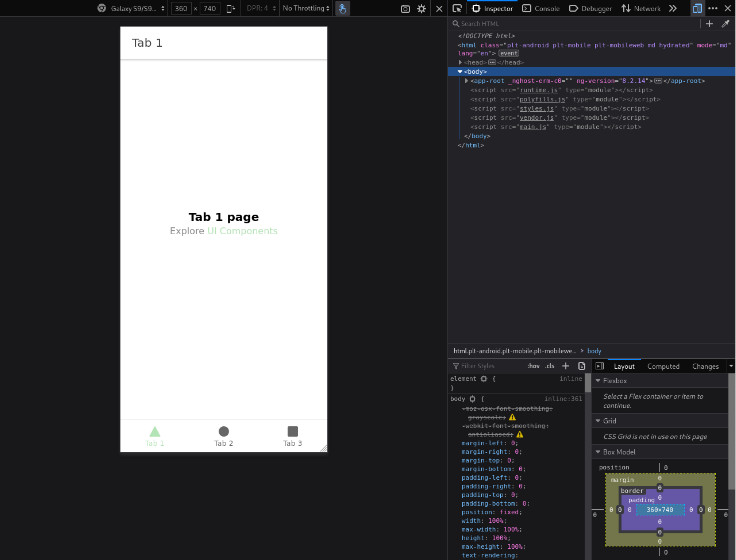
After installation, I could run the app with ionic serve, which resulted in a template app with the settings I had set on the App Wizard.
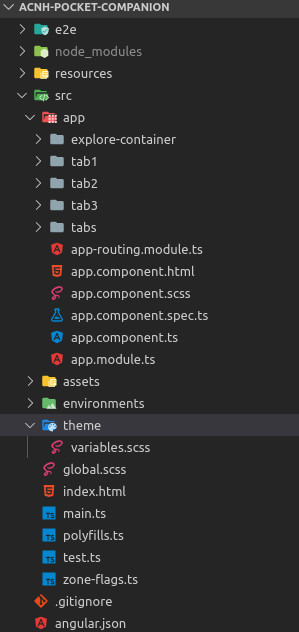
The default folder structure is pretty straightforward and should be familiar to anyone who has ever worked with Angular before.
Starting development
Since I am a visual person, I decided to start work by changing the looks of the app first. This helps me stay motivated since I can see progress faster (because everything I do results in a visual change), and it also allows me to visualize the final product earlier, and gives me more time to think of good features or UX improvements.
Even though I generated my project using the Tabs template, I decided that I don't want tabs in my app. So I had to do a few changes to the routing configuration.
First, I created a new page that I can use as the initial screen for my app. Ionic CLI makes it easy to create pages and components. Just running ionic generate page home created a page called Home, and automatically adds its modules to the Angular config, and its route to the Angular Router.
After that, to remove the tabs, all I had to do was set the default route ('') to redirect to home, and then I could delete all the Tab pages.
			import { NgModule } from '@angular/core';
import { PreloadAllModules, RouterModule, Routes } from '@angular/router';

const routes: Routes = [
    {
        path: '',
        redirectTo: 'home',
        pathMatch: 'full'
    },
    {
        path: 'home',
        loadChildren: () => import('./home/home.module').then((m) => m.HomePageModule)
    }
];
@NgModule({
    imports: [RouterModule.forRoot(routes, { preloadingStrategy: PreloadAllModules })],
    exports: [RouterModule]
})
export class AppRoutingModule {}
Theming and Layout
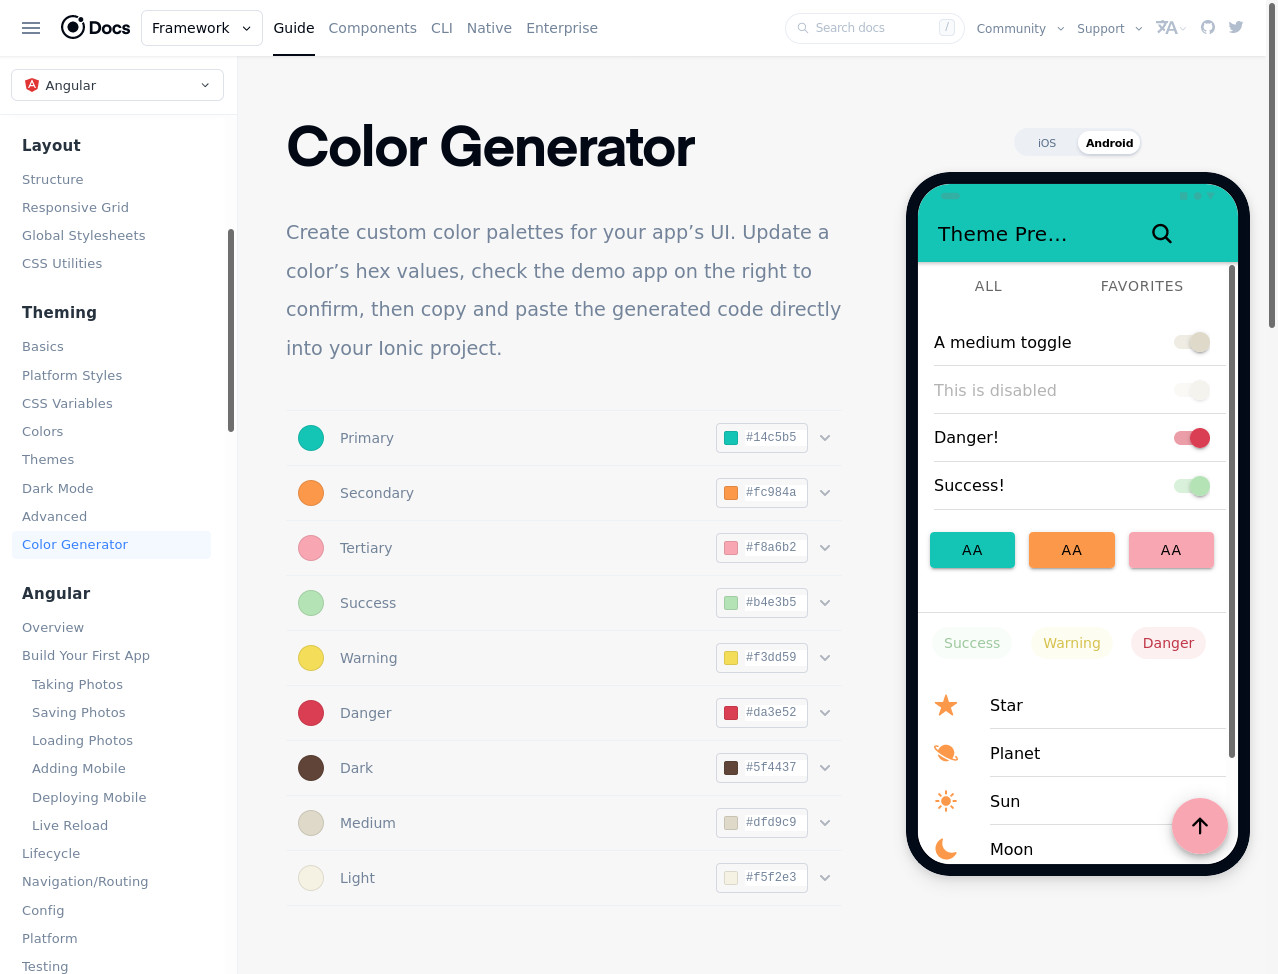
For me, this is the best part. Ionic makes it SO easy to change themes! There's a variables.scss file on the theme folder, where you can find Ionic's default color palette and change anything. But they provide an amazing Color Generator that can make all the palette calculations for you. Just put your primary/secondary/success/danger/etc colors in there, and it will output the code for you to paste on your app.
After some time styling, I modified the layout of the two page skeletons I wanna have, the Home page (that mimics the Nookphone in the game), and I styled the header of the other pages.
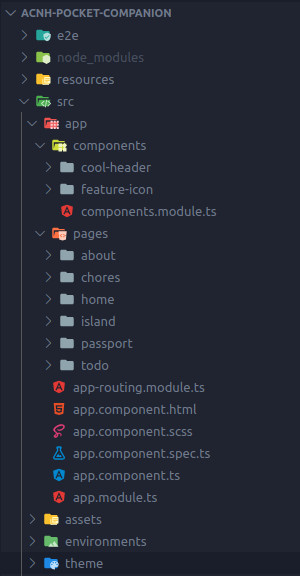
Since I wanted to have the same header on all pages, I ended up creating a component for it. Since I had already two components and six pages, I decided to split them up in different folders (I honestly don't know why Ionic doesn't do that by default). My folder structure ended up like this:
Also, to be able to import the same component into multiple Pages (each page with its own module), I had to create the ComponentsModule. This required a bit of searching because I wasn't familiar with this approach yet. ComponentsModule by itself is very simple, I just import the Components there:
			import { NgModule } from '@angular/core';
import { CoolHeaderComponent } from './cool-header/cool-header.component';
import { IonicModule } from '@ionic/angular';

@NgModule({
    declarations: [CoolHeaderComponent],
    imports: [IonicModule.forRoot()],
    exports: [CoolHeaderComponent]
})
export class ComponentsModule {}
The annoying part was having to add ComponentsModule to each of the pages. There probably is an easier way of handling this, but right now I decided to not dig too deep into it.
After making the skeleton of the app, I started working on some specific pages. I started with the home screen, that mimics a cell phone's app grid. I'll probably add more options as the app evolves, but for now this is good enough to build the layout with.
The next screen to be done was the Island one. It is a simple form with some text inputs, a datepicker and a couple of dropdowns. I used Ionic's default components for them and styled them with CSS so they fit the app's style better. Everything was pretty simple to do and worked great. Ionic's docs made it super easy to find the available options and easier ways to theme.
I wanted to add another thing to this screen too, though: a section containing the island's villagers, and a search box that allows the user to select them. Just adding another "card" to the UI and making it scroll would deliver what I want, but it wouldn't look awesome. GitHub's recently released mobile app has this bottom drawer that I personally found awesome:
Luckily for me, someone's already worked on something like that for Ionic, which means I don't have to do it from scratch! Click here to check it on GitHub. Unfortunately it is not (at the time of writing) available as an installable component on NPM or somewhere else. But the code is simple and I just copied it over to my own project.
State Management
Since the entire point of this app is learning, I decided to use NgRx. It is a State Management library for Angular that works in a similar way to VueX or Redux. I've worked with VueX recently and really like the concept, so I decided to make use of it here.
I started by adding it to my application with npm i @ngrx/store @ngrx/effects @ngrx/store-devtools @ngrx/schematics --save. If you wanna learn more about NgRx, I used this amazing tutorial to learn it for this app.
Database
The best way to store data in an app like mine - supposed to work on Android, iOS and the Web, but still entirely offline - is using the browser's IndexedDB. It's basically a simpler SQL database for your web app that lives inside the browser. You can read more on MDN if you'd like.
While useful, IndexedDB has a very low-level API, which makes it hard to get started with. Which is why I chose to use Dexie.js as a wrapper for IndexedDB. It allows me to use a simple API to query data, while already doing the needed optimizations.
Simply installing Dexie.js and a quick read on its documentation allowed me to successfully store and read persistent data for my app.
Putting some other cool things in practice
Since the main purpose of developing this app is learning, I decided to use some cool stuff I've learned and put them in practice:
- Web Workers: on first run, the app uses a web worker to parse the game data (contained in large JSON files) in the background, so it can fill the database with the data used on Critterpedia
- Virtual Scroll: on the Critterpedia listings, I used Virtual Scroll instead of pagination. I figured this was a better choice because while it can have a lot of items, it's a fixed number so no need to paginate. This way it maintains good performance on scrolling even on lower-end devices. Luckily, Ionic provides a built-in component for that!
- Lazy loading images: since all items in the list have an icon that's displayed besides them, there are lots of images to download. Without lazy-loading, ALL images would be loaded right off the bat, even the ones way down the bottom of the list. With lazy loading, the browser automatically downloads only images as they would appear on screen by just setting the
loadingattribute:<img loading="lazy">
Running on Android
After having a few parts of my app done, I decided it was time to run in on my Android phone, to have a better look of how it will look and feel on an actual device.
The first step for this is installing Android Studio. Install instructions may vary depending on your operating system. I'm on a Linux-based OS so I installed it from Snapcraft. You can follow the instructions from the Ionic docs if you'd prefer.
After installing Android Studio, we need to add an environment variable that points to the Android SDK. In the following command (Linux, Mac), replace the directory with the one where the Sdk is installed in your PC, then add it to the end of your .bashrc file:
export ANDROID_SDK_ROOT=$HOME/Library/Android/sdk
Adding these next lines to the .bashrc file will also give you a quick way to access these Android tools if needed:
			# avdmanager, sdkmanager
export PATH=$PATH:$ANDROID_SDK_ROOT/tools/bin

# adb, logcat
export PATH=$PATH:$ANDROID_SDK_ROOT/platform-tools

# emulator
export PATH=$PATH:$ANDROID_SDK_ROOT/emulator
Now, we have to register Android as a platform for our app. Since we're using Capacitor to make this bridge, we need only a single command:
ionic capacitor add android
If you get an error saying that "Capacitor could not find the web assets directory", be sure to run ionic build to generate this directory first.
After that's done, you can open the project in Android Studio (it will be on a folder called Android at the root of your project). If you still haven't setup a device or emulator to run your app in, do it now. The Ionic docs show how to do both processes.
After a loooong while, Android Studio will have loaded all it needs to run your project. Just click on Run (Shift+F10). It should open on your phone/emulator!
PWA preparation
To be able to publish the app as a PWA, we need to add a Service Worker and a Manifest. Thankfully, Angular already has the CLI and the packages that allows us to do that easily. ng add @angular/pwa worked like a charm. This automatically added the needed files, and wired it up with the existing Angular modules automatically.
After that, I edited ngsw-config.json and manifest.webmanifest files with my app's name and colors, and I replaced all generated icons with my own. For more details on how to create PWAs with Angular, check my specific post for that
Routing issue
One issue I was having after publishing a PWA like that is that when refreshing my app on the browser, it was throwing a 404 error. This happened because the route had changed and Angular lost track of what it was supposed to open. I fixed this by changing a line in my app-routing.module.ts and adding useHash: true to the settings:
			@NgModule({
  imports: [
    RouterModule.forRoot(routes, { preloadingStrategy: PreloadAllModules, useHash: true })
  ],
  exports: [RouterModule]
})
Publishing
To host my PWA, I decided to use Netlify. The publishing experience was quite easy and friction-free, and they also provide a free hosting plan which is perfect to host this demo-only-app. I will not document how the publishing proccess worked here because their UI is very intuitive and their docs would be way better than mine anyway.
Wrapping Up
Developing this definitely took me a while - but that's because time's been quite scarce for me. Most of the development time was spent learning NgRx, which was definitely the most complex part of this application. It also took me a while to find a good IndexedDB wrapper before I settled on Dexie. The rest was quite straightforward - the app logic is simple, and what took the longest was making the app pretty and the animations smooth.
I think the result is quite good - definitely not professional, but more than enough for a hobby app. I learned a lot working on it and would definitely do it again. In case you missed it, here's another link to check out the result, and its source code.
Thanks for reading!